Step-by-step instructions.
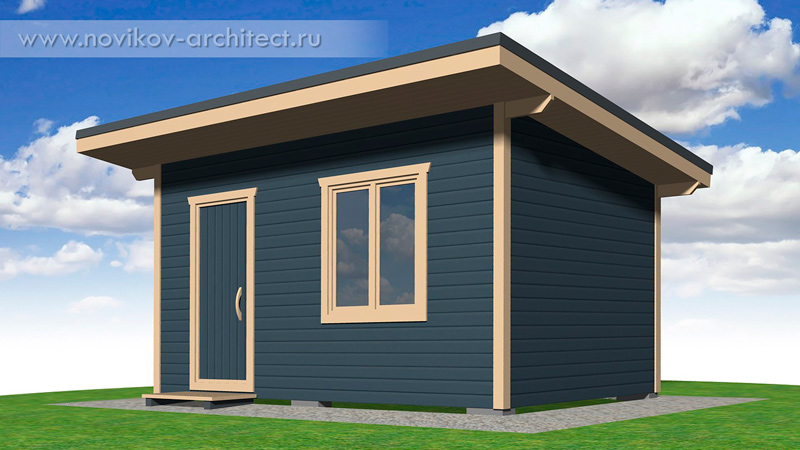
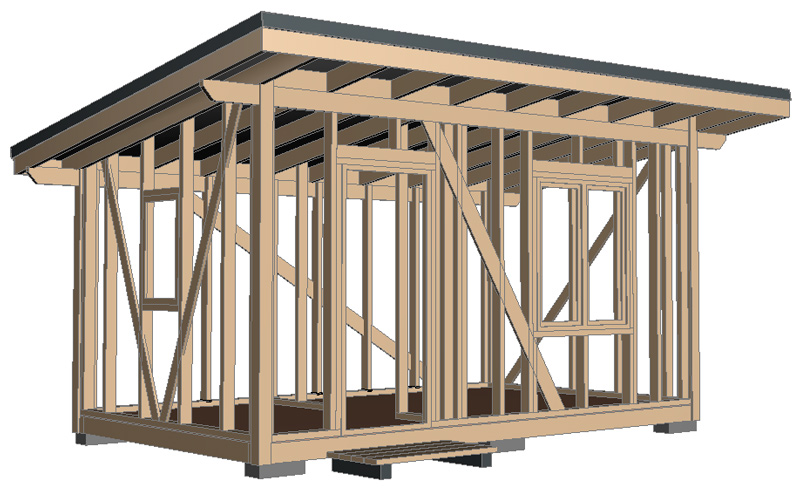
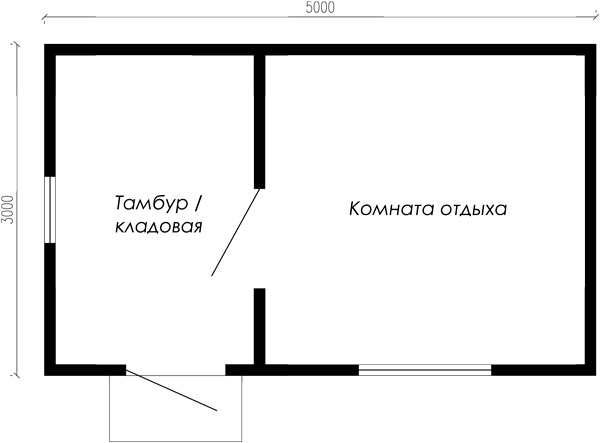
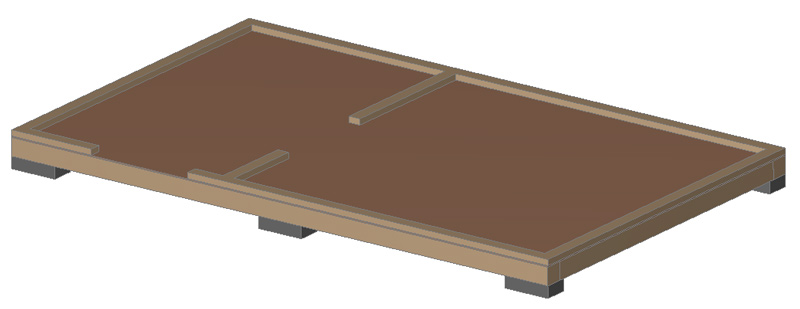
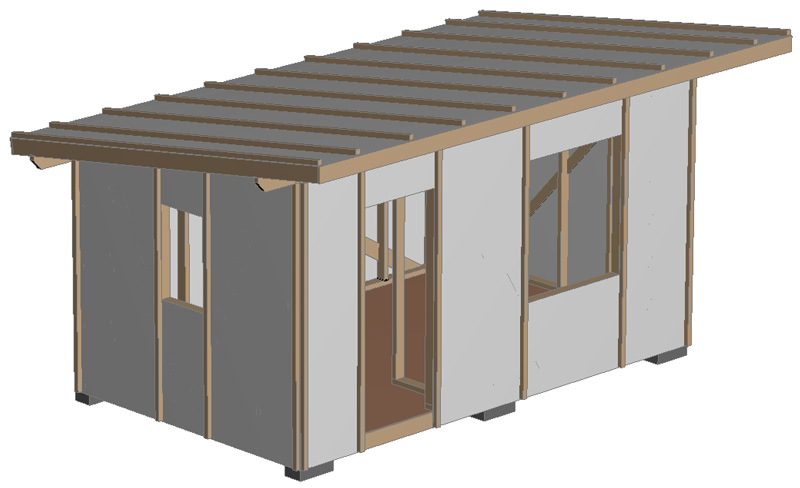
In this article I will tell and show how to build a small wooden frame utility room with your own hands. The utility room is insulated, consisting of 2 rooms: a vestibule-storage room and a recreation room. If desired, you can not divide the utility room with a partition and leave a single common room. The overall dimensions of the utility room (outside along the frame without taking into account the layers of cladding) are 5 x 3 m:
Bathhouse plan:
Subscribe to our Blog on Yandex Zen – we regularly publish new articles and videos on the topic of architecture, design and construction.
Even one person can build such a utility room for a summer house or country house with their own hands. Construction materials, including interior and exterior finishing, will cost approximately 150-200 thousand rubles (depending on the quality/grade of materials used) excluding delivery at 2021 prices.
At the end of the page there is an opportunity to purchase detailed design drawings with specifications for the project of this utility room (M-35).
Necessary tools.
Here is a standard set of required tools:

- Scoop shovel;
- Circular saw;
- Screwdriver;
- Perforator;
- Angle grinder with a grinding attachment;
- Measuring tape and construction pencil;
- Hammer with a nail puller (possibly a separate nail puller);
- Building level;
- Construction square;
- Stapler;
- Wood saw;
- Chisel;
- Set of wrenches;
- Brushes (for applying antiseptic and finishing coating (paint, oil);
- Protective equipment (glasses, gloves).
Foundation and strapping.
The foundation for such a utility room can be either permanent or non-permanent – depending on whether you plan to use this utility room temporarily or leave it for a long time. If we talk about a permanent foundation, then there are 2 options: pile (screw steel or driven reinforced concrete piles) or columnar. A columnar foundation with your own hands will be cheaper than a pile foundation by several times – I told you how to build it here .
In this example, I will show a non-capital foundation option. Pits (6 pieces) are dug, 50×30 cm in size and 40-50 cm deep. Geotextile is placed in the holes and sand and gravel mixture is poured in to a level of 5-10 cm below ground level (carefully compacted layer by layer and watered). Then concrete blocks 20x20x40 cm are laid and sand and gravel mixture is compacted around them:
It also makes sense to make a blind area around the trailer (after the trailer itself has been built) to reduce the likelihood of severe frost heaving of the soil. The simplest option is a gravel blind area over waterproofing from Planter
from TechnoNIKOL:
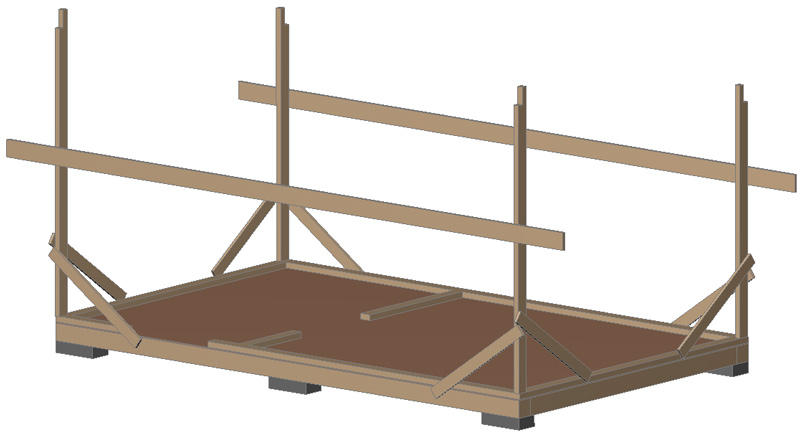
Bottom overlap.
The lower strapping made of 150×150 timber is laid on the concrete blocks. They are secured to the concrete blocks with M10 anchor bolts. Between the timber and the concrete blocks, waterproofing is laid from roofing felt (2 layers) or bitumen mastic coating.

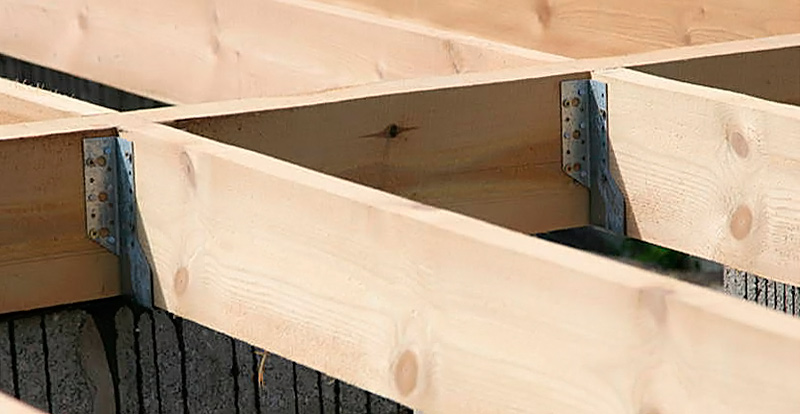
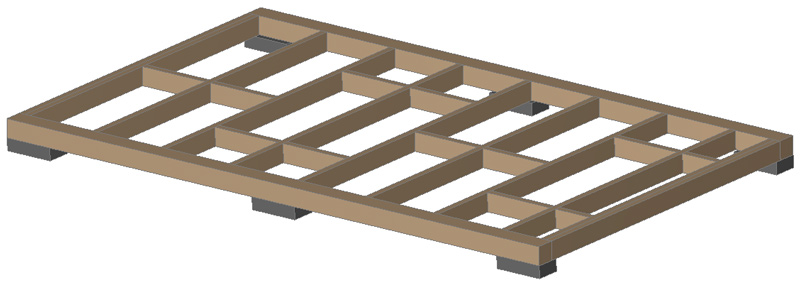
Floor joists made of 50×150(H) boards are attached to the strapping beam using steel beam supports.
The supports are nailed down (preferably) or with universal self-tapping screws (not black, diameter min. 5 mm):
The distance between the joists should be 10-15 cm less than the width of the insulation. A subfloor made of plywood (sheets measuring 1.5 x 1.5 m in a checkerboard pattern) will be attached over the joists. To attach the plywood, lintels made of 50 x 150 (H) boards are nailed between the joists (all
wooden structures should be treated with an antiseptic twice) :
At the bottom of the logs, cranial bars are nailed, on which a flooring made of 150×25 boards is laid (the insulation will lie on it). A windproof film is attached to the logs from below (under the flooring).
Fill the space between the joists with insulation. In this project, I use mineral wool insulation TeploKNAUF 600 mm wide. On top of the insulation, a layer of vapor barrier film.
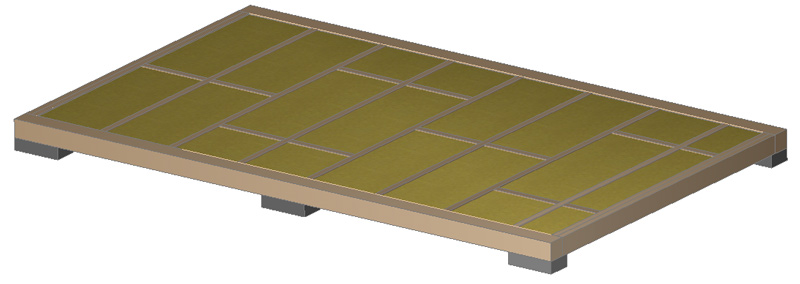
Subfloor and lower frame trim .
Lay sheets of FK plywood (not FSF!!) in a checkerboard pattern (with a gap of 3-4 mm between the sheets) and nail with 70 mm nails or self-tapping screws. I would like to point out that here and below we mean universal self-tapping screws. Black self-tapping screws cannot be used. The frame made of 100×50 (H) boards is nailed with 100 mm nails to the joists through the plywood with a step of 50-60 cm. In places where doors are installed, make openings in the frame if you do not want to have a high threshold:
Finished floors:
The subfloor here is plywood. Finishing floors can be made on top of it after the frame is fully assembled. Although for a utility room, plywood can also serve as a finishing floor at the same time, especially if you use high-grade 1/2 plywood and varnish it. In the recreation room, linoleum can be laid on plywood.
Corner posts of the frame .
In this project, I make the frame 100 mm thick. This is enough for the strength of the structure. But if you want the insulation thickness to be more than 100 mm, you can make the frame 150 mm thick.
The posts made of 100×50 boards are attached to the frame with 2 100mm nails (or corners on nails or 5x50mm screws). In the vertical position, the posts are fixed with temporary braces. Also, temporary guides made of 25×150 (H) boards are nailed to the posts for ease of installation of the intermediate posts of the frame:
Racks and top trim.
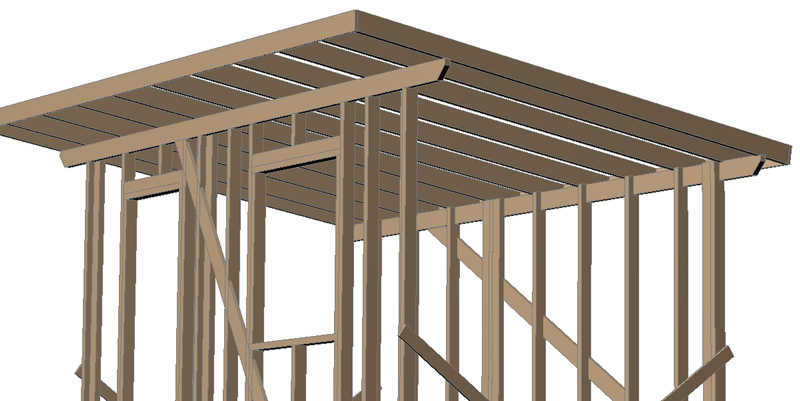
Intermediate posts made of 50×100 boards are installed in accordance with the location of the window and door, and also taking into account the width of the insulation (attached to the frame with 2 100 mm nails). A 50×150(H) cutout is made in the upper part of the posts for laying the upper frame. The upper frame made of 50×150(H) boards protrudes beyond the frame by 500 mm:

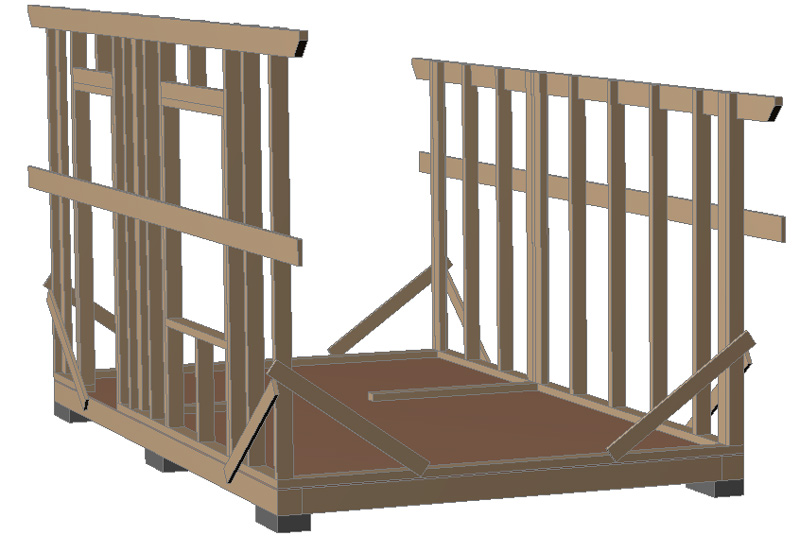
To give the frame rigidity, cut braces from a 25×150 board into the wall frame and nail them with 2 nails to each post , upper and lower trim. After this, you can remove the temporary longitudinal braces:
Rafters.
Rafters made of 50×150(H) mm boards are laid on the upper trim (the pitch takes into account the width of the insulation). The rafters are treated with an antiseptic twice. Fasten the rafters to the trim with steel corners on self-tapping screws or nails (5×50 mm).
In places where the rafters rest on the wall strapping, make cuts in the rafters.
Between the rafters, lintels made of 50×150 boards are mounted (nailed with 4×100 mm nails) on the upper strapping of the wall frame. A wind board is nailed to the ends of the rafters – from 2x 20×90 (H) boards (it will serve as the finishing finish, so it is better to make it from planed board) :

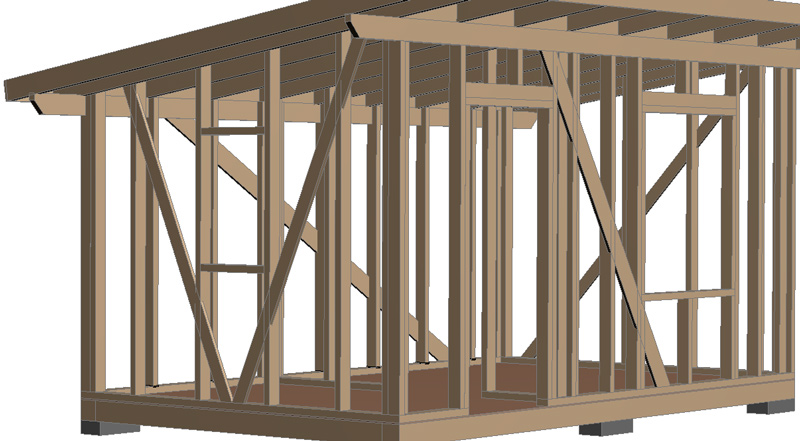
Transverse walls.
Then the cross wall posts (external and internal) are installed from 50×100 boards (the pitch takes into account the width of the insulation) . From above they are nailed to the rafters :
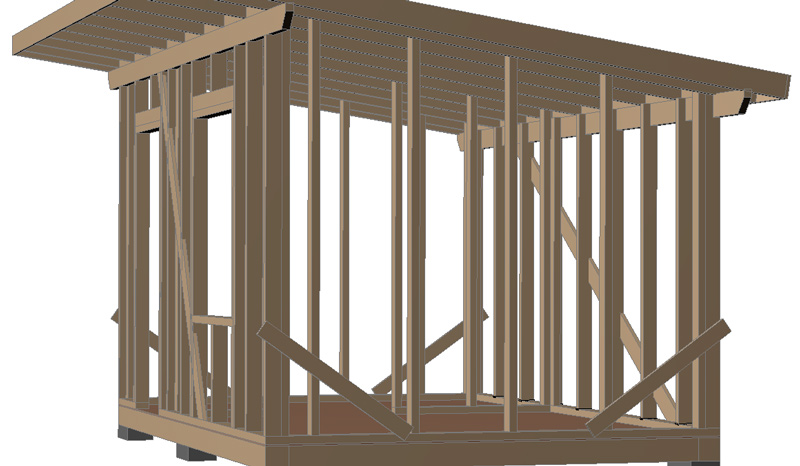
Cut braces from 25×150 boards into the frame of the transverse walls and nail them with 2 nails to each post , upper and lower trim. After this, you can remove the temporary transverse braces:
Wind protection.
In this project, a moisture-windproof membrane is used as a wind protection (fastened with a construction stapler). If desired, Isoplaat or Beltermo 25 mm boards can be used as a wind protection . They also serve as an additional layer of insulation and give the frame additional rigidity:
Lathing and roofing.
Nail a counter-batten made of 50×50 bars with 4×100 nails on top of the wind protection along the rafters and frame posts. Nail a batten made of 25×150 mm boards perpendicular to the counter-batten on the roof . Treat the batten and counter-batten with an antiseptic.
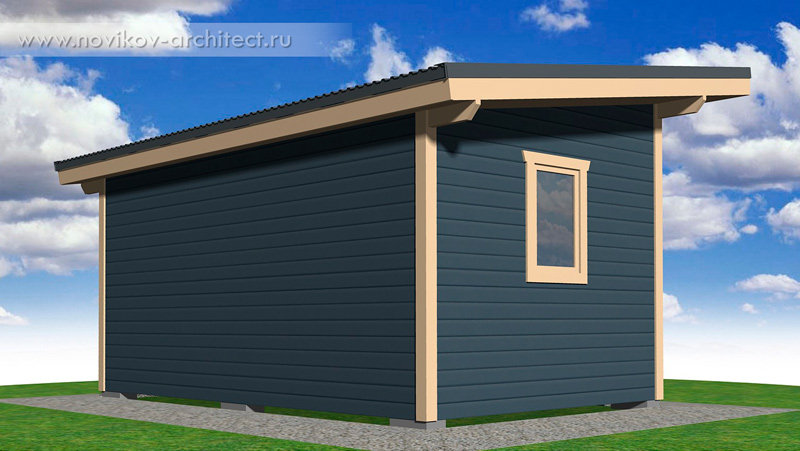
The roof covering is laid on the roof lathing: this project shows corrugated sheeting. You can also use metal tiles or ondulin. It is attached to the lathing with special roofing screws).
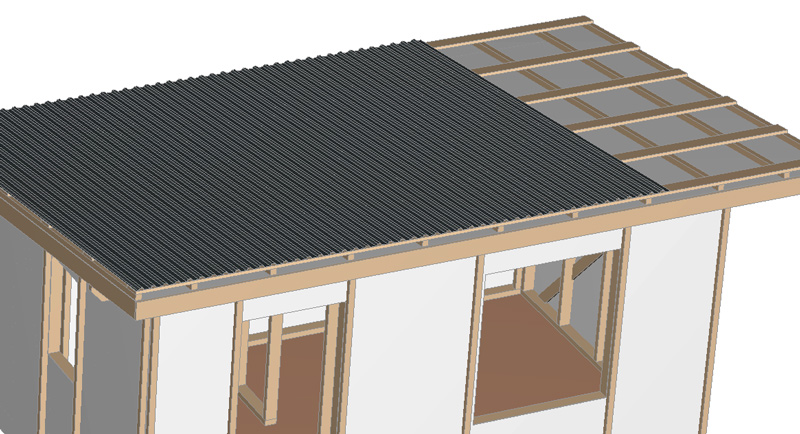
A wind strip is mounted on the roof at the front and sides. A drip cap is mounted at the back (under the corrugated sheet, installed before laying the corrugated sheet).
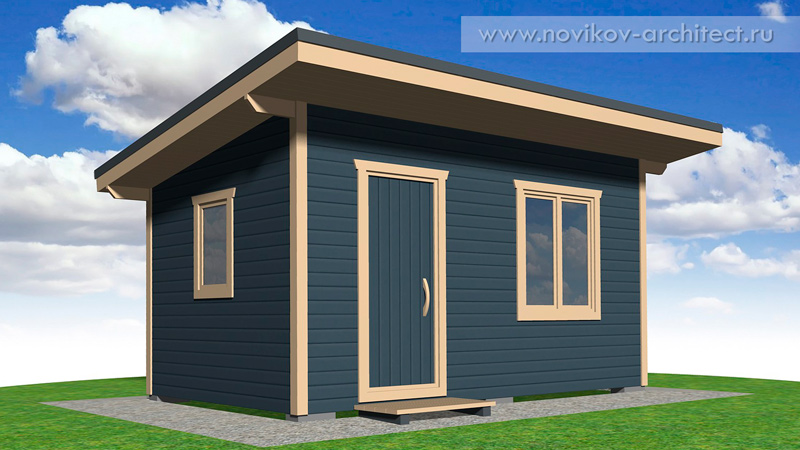
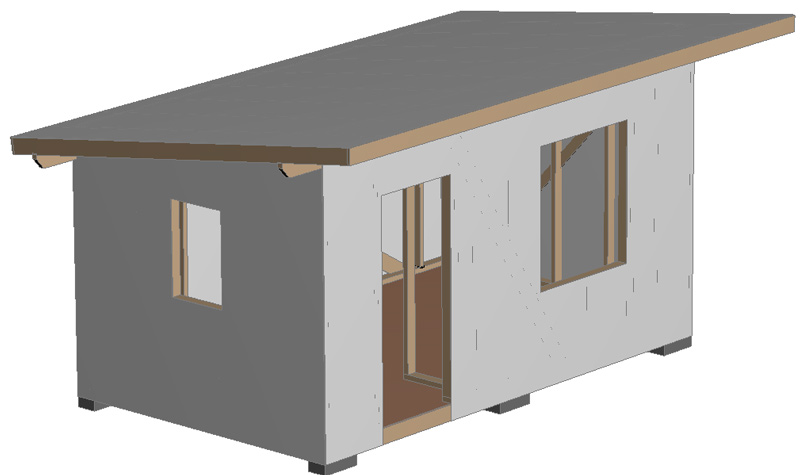
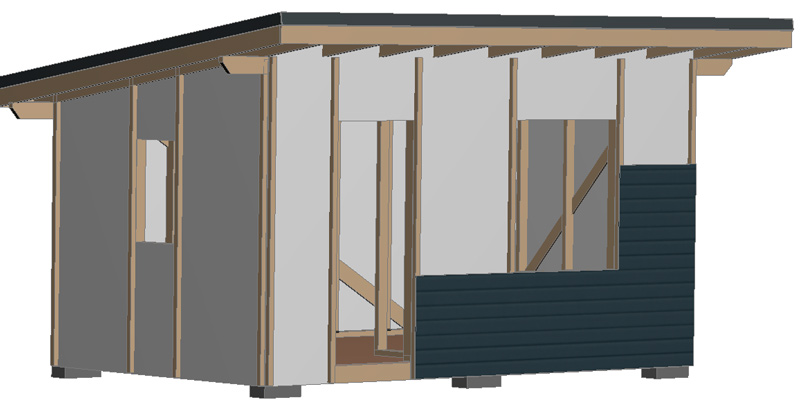
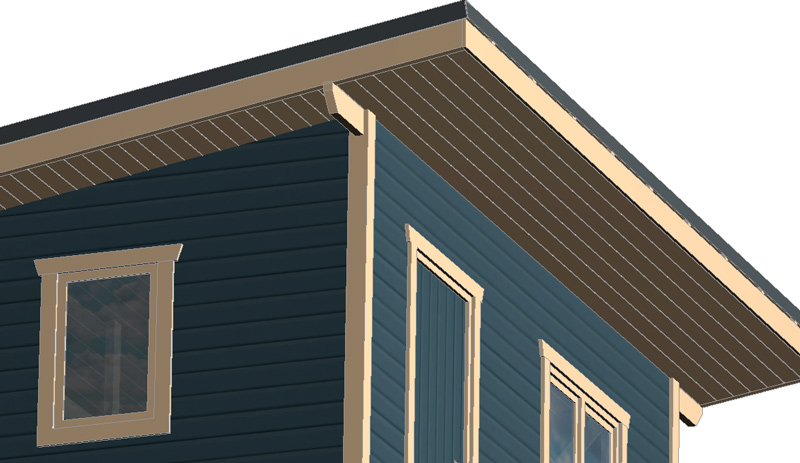
Exterior wall decoration.
The Shtil lining (or imitation timber) is mounted on the counter-lattice using self-tapping screws. To protect against mice from penetrating from below, a steel mesh with a small cell is attached along the perimeter of the counter-lattice.
Finish coating of the facade in 2 colors:
light (all elements shown in the picture in beige) – facade oil with wax .
dark (lining) – paint (color RGB 5 5 -6 5 – 79).
Roof covering color (corrugated sheet) – anthracite 7016.
To protect against mice penetration, a steel mesh with a small cell is attached from below along the perimeter of the counter-lattice.
Door and windows.
You can buy a ready-made door or make it yourself. I suggest the following option: a sheet of plywood is cut to the size of the door. 20×90 mm boards are attached to it along the perimeter with self-tapping screws. 20 mm thick foam insulation is placed inside. From the outside, this board is covered with clapboard. Inside, the plywood is also covered with clapboard.
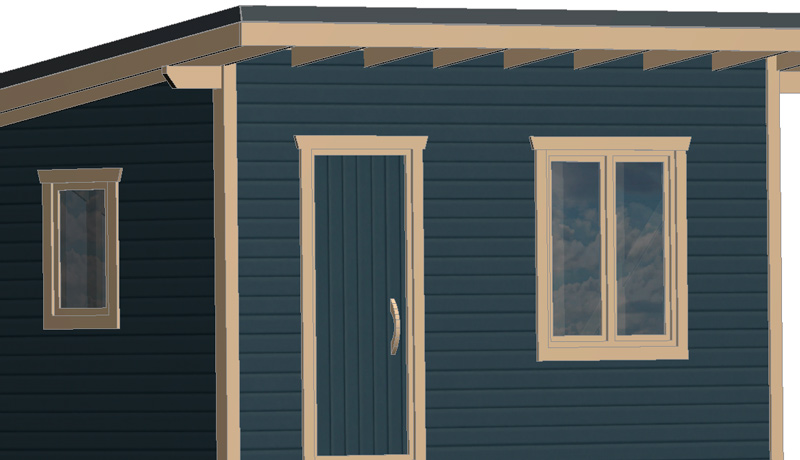
All openings in the project are of standard sizes:
doors: 900×2100
Windows: in the recreation room 1200×1350(H) and in the storage room 600×900(H).
Door frames made of dry planed boards 20×90 mm.
Roof sheathing.
Along the bottom of the rafters, the lining can be made from dry planed boards 20×90 mm with a gap of 3-5 mm for ventilation of the roof structure.
Insulation and interior finishing.
As I wrote above, in this project I use mineral wool insulation TeploKNAUF. The thickness of the floor and wall insulation is 2 layers of 50 mm . Roof insulation (between rafters) is 3 layers of 50 mm. Inside, on top of the insulation, there is a layer of vapor barrier film. On top of the vapor barrier, there is clapboard sheathing.
Ventilation .
It is not necessary, but highly desirable to make ventilation holes in the walls to ventilate the utility room. To do this, make a supply ventilation duct through the wall in the end wall in the rest room with an adjustable valve at a height of 5-10 cm from the floor:
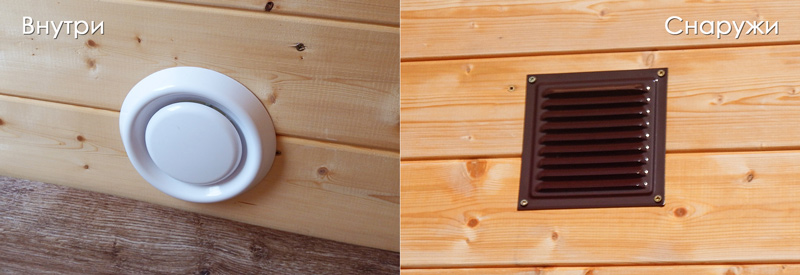
Make a similar exhaust duct in the end wall of the storage room at a height of 2.1-2.3 m from the floor. The same duct in the partition.
__________________________________________________________________________________________
Buy the project of frame utility room M-35 :
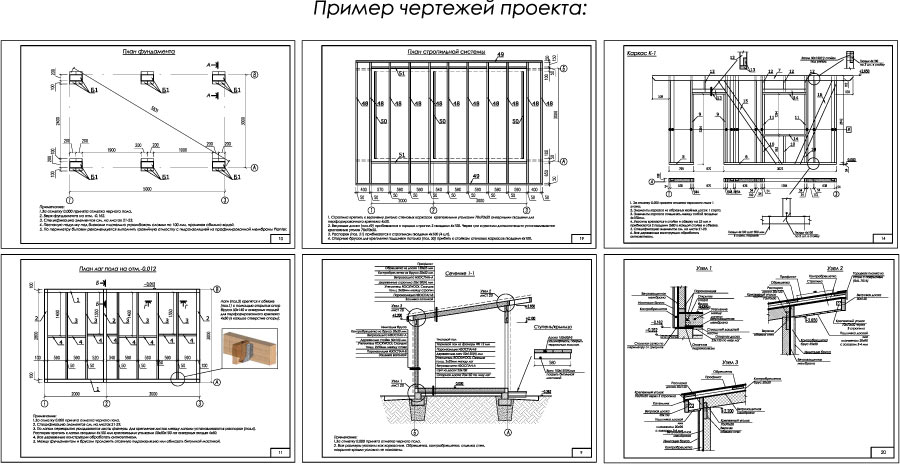
You can buy a ready-made project of this utility room for self-construction. The project is a pdf album (24 A4 sheets) with detailed architectural and structural drawings, all necessary dimensions, units and specification of building materials.