*full disclosure, I am by no means a professional woodworker, just passionate for frugal DIY projects
You guys… I built a floating deck. By myself. I mean, I had some help, which I will share with you in a minute. But the bulk of it was all built by mom (& baby). From designing it to drawing it to nailing and screwing it together. The sick part is – I saved $4,500 by doing it myself…!
And because I’m a clumsy fool, I designed it specifically so I would not need to trim any lumber. I’ve seen Final Destination, so any sort of saw is out.
If the cost savings and simplicity weren’t enough, I did it in less than 48 hours. But I did it patiently.
I recently drew up plans for a simple, no saw needed 10×12 floating deck and packaged them up in a short pdf. People LOVE it and I am so proud of all the deck babies my readers have sent me.
I had a reader update me with a really good looking deck pic and said it took only 8 hours & I’m not even surpsrised! You can grab your copy below!
Table of Contents
- How long does it take to build a deck by yourself?
- How much does it cost to build a deck?
- Why I built a deck instead of laying pavers
- How to build a floating deck by yourself
- Awesome deck plans and free resources I used to DIY
- Universal Deck Building Tips
- MY order of operations (how to build an inexpensive deck alone)
- My Deck Materials List
- deck #1
- Phase 1: framing
- Phase 2: securing it to the ground!
- Phase 3: put a top on it
- deck #2
How long does it take to build a deck by yourself?
I don’t want to mislead you, so here’s my secret to speed. Building a deck in less than 48 hours takes… patience
It wasn’t done in a weekend. It was completed over weeks. Cramming those 48 hours into a weekend takes two things:
money & plans
But since I’m super frugal and I started this project just to make our daily outside time more bearable, it started small and kept going from there.
So while I was alone with my baby and my husband was away at school, I started cranking out plans and hammering nails.
I started with a 10’x10′ mini-deck, but after I realized how EASY it was, I couldn’t stop. There are jokes that my entire backyard will be a deck before the next birthday party.
****the plans I made for you can be done in a DAY. One reader said it took him alone only 8 hours & I am not surprised. They are that simple.
I spent maybe an hour every few days getting things going during our regular outside time.
Measuring dimensions, researching building codes, and finding my big deck energy. If you follow me on Instagram, then you’ve probably caught snippets of my deck building process! It was a sweaty, good time.
When I quit my job to work from home, my daughter and I created a new full-time mom & baby routine. We would play outside every day for at least an hour or two. The thing is our backyard is a dirt pit. It’s partially thanks to our giant, fetch-happy dog and partially just because it’s a fixer-upper.
So with all my outside time, I was sick of being filthy before 10am everyday! So I already knew I needed a deck, and now that it is all said and done, I have a 10’x22′ floating deck with a 2’X8′ step on one side.
How much does it cost to build a deck?
The short answer is the cost of the materials. But if you ask a “deck builder”, it’ll be 3 times that amount. I guess that is the standard market rate.
*UPDATE* – Lumber prices have skyrocketed since mid 2020. The current price of wood is about 3 times that cost when I built my deck. You can check the lumber prices here. I do like every day just hoping
I paid just under $500 for EVERYTHING.
Before my daughter’s first birthday party, I called a specialized deck builder and asked for an estimate. He quoted me FIVE THOUSAND DOLLARS. Frugal me said “thanks but fuck that”. The materials for his estimate ran about $1,200 so ummmm what?
If I learned anything from my finance degree, it’s the value of a dollar. I understand that he has a business to run and he needs to turn a profit and pay for his employees and other operating costs. Also, the time value of money says that I’d be paying for a much sooner completion date.
Not worth it. At least not for me. Like I said — patience.
I had predetermined that I would hire him if he came back at $3,500 or less. But I just couldn’t justify paying over 200% of the materials cost for the labor.
***I recently heard “don’t pay anyone for something you can do with your own hands” and it reallllly resonated with me. That’s one of my frugal principals and I feel it on a spiritual level!
RELATED: The 10 Easiest Frugal Lifestyle Tips to Pick Up Today
Why I built a deck instead of laying pavers
Despite just wanting a way out of the dirt, I knew it had to be made of wood. People come over and see the potential of our fixer upper, so we get a lot of suggestions. Everyone (including my husband) thought I was overreaching with my big deck energy. (I’m coining that term, btw)
Almost everyone told me to do pavers. But the thing is, that wasn’t going to work. We actually had pavers back there and they were more of a hazard than anything. The roots from the trees in our neighbors’ backyard are serious.
And did I mention the dirt pit? Sweeping is a pain, and lasts *maybe* 20 minutes with the dog and debris from those dang trees. I wanted a raised, platform deck with spaces for dirt and leaves to fall through. And I know what I want.
How to build a floating deck by yourself
This is the keyword I kept coming back to, and let me tell you it’s not easy to find “the perfect tutorial” for a solo amateur. Not that I thought it would be, but I wanted the simplest deck plans I could get my hands on.
I didn’t find it. It doesn’t exist!
So in addition to my backyard’s quirks, I wasn’t comfortable using a buzzsaw so all the DIY posts weren’t right for me.
But since I knew I wasn’t going to pay for someone else to do it, I had to find the best ways to hobble together all the tutorials I could find.
Awesome deck plans and free resources I used to DIY
Thankfully there are LOADS of free deck plans, information, tutorials, etc. But unfortunately everything is hyper specific to the particular space that it’s being built on. I was able to put together a hodgepodge list of rules and guidelines.
- Since I could only go 10′ wide, I went with this tutorial for the framing. This website has a ton of awesome information on work working in general. Everything from furniture plans to calculators. Which brings me to…
- A Deck Joist Calculator. This is critical. The joists keep the deck boards from bowing/dipping/collapsing. Even though it would only be about an 8″ drop if the thing collapsed, I didn’t want to worry about that (duh!) I maxed out our capacity load, which is why we threw a few extra deck blocks in here and there.
Universal Deck Building Tips
No matter what your plans look like, here are a few things that are unchanging.

- The deck boards should always be “bark side up” meaning the rings should be turned down.
There’s a debate about this, but it seems pretty logical to me. With the rings turned up, you create a cupping feature which just adds to water damage and warping. So the left board is correct.
- Spacing between boards is really up to you
I heard both ways. You need to space the deck boards (which we did with the first deck) and you shouldn’t space the deck boards (which we did with the second deck).
With the deck #1, we used a few nails to space the boards before screwing them down. It left a nice little space which is perfect for dirt and tree debris. But they spread even further over the last 6 months. It looks like a little too much n some places, but it’s better than dirt!
Deck #2 is only a few months old, and the shrinking hasn’t happened yet. I’m hoping it does, otherwise I wish I had just spaced them again. They are right on top of each other and I find myself sweeping too much for my liking.
If I had to do it again, I would’ve spaced the second deck just like the first.
- Ground contact Pressure Treated Lumber is the only way to go for all your framing, posts, joists, etc.
You could use whatever you like for the deck boards, but we went pressure treated with that too. There are just too many pests and risk of wood rot here in Florida.

There I am! All guts and glory with deck #1 beneath me! My cousin gifted me a 4′ level for Christmas and I had never received a gift so perfect hahaha.
MY order of operations (how to build an inexpensive deck alone)
Everyone has their own way of doing things, but I am notoriously against a lot of standards.
Don’t get me wrong! The deck is sturdy. Completely sound. There are cement footers and deep posts. It’s not at all “wobbly”, which is something I’m very proud of! I have some half-ass tendencies, so this is a huge deal for me.
I did it in a way that worked for me, and me alone. The ways I was advised to build it required an extra person. And that wasn’t an option.
Some things I did differently are
- building the frame before plotting the post locations (I wasn’t about to level some strings)
- not securing the deck to the house (it’s not raised, and I only wanted it floating but house-adjacent)
- not cutting a damn thing! (most deck plans call for an inch off here, a foot off there. Like, why?)
- built & bought materials in phases (see below)
My Deck Materials List
My little brother would meet me and baby girl at Home Depot (and eventually Lowes) with his truck, and we loaded it up with that phase’s materials haul.
A few things to note:
- I always loved Home Depot, but Lowes has better pricing and higher quality lumber.
- Toward the end of my project, I would order everything online for in-store pickup. It made things soooo much easier for a mom like me!
Deck Building Tools I Used
- Post Hole Digger
- Spade Shovel
- Hammer
- Screw Driver
- Cro-Bar
- Deck Screws
- Nails (I don’t know why, they told me to)
I purchased the materials in phases for my budget’s sake. And maybe because I knew how limited my deck-building time was. I like to chip away at little goals!
deck #1
Deck #1 made me so happy! We finished it the day before New Year’s Eve and had a Christmas Tree Burning get-together on New Year’s Eve to break it in.
Call it a deck-warming party, if you will. It was so nice to be out of the dirt! There was still a ton of dirt, but we had a 10×10 pressure treated sanctuary of my own creation.
Here’s the finished product. So fresh & so clean… for the first hour.


Notice all the damn dirt? As small as it might be, my favorite saying around here is “it’s better than dirt!”
Phase 1: framing
- 2 2×8″ at 10′ PTL
- 1 2×10″ at 10′ PTL
- 9 2″x6″ at 10′ PTL
- 2 2″x6″ at 8′ PTL (for the step framing, one was cut into 4 2′ segments for joists)
- nails… smh

These are all my joists/beams! They lay right over the concrete slab (which was a huge help in establishing a solid foundation) but I still needed posts on the closest two corners.
I used bricks/pavers/whatever I could find to prop it up while I leveled it.
 don’t mind us.. just fantasizing about being out of the dirt lol
Phase 2: securing it to the ground!
Thanks to my little helper (& the baby was there too! haha!). My husband came home for Winter Break and helped me make sure the deck was perfectly level before we set the posts in concrete. I was nervous about that bit! I wanted some extra hands at this point.
- 4 4×4″ at 4′ deck posts (these were donated by my father-in-law, otherwise I would’ve purchased 2 8′ posts and had them cut in half at the store.)
- 2 bags of Quickrete, fast setting concrete mix
- 7 Galvanized, reinforcing L-angles

Phase 3: put a top on it
- 21 5/4″x6″ at 10′ PTL deck boards
- 5 5/4″x6″ at 8′ PTL deck boards
- a whole hell of a lot of deck screws
My daughter just had to have her own tool set because of this project. If you look really close you’ll see a tiny hammer


the first board!!


I don’t know how to pose, but I had to give Tano some instagram-husband practice!

In all honesty, this might have been the ONLY screw I put in on deck #1. I much preferred a hammer and nails back then. Using a screwdriver made me a little uncomfortable too, so installing the deck boards was my husband’s job on deck #1. (thanks babe!)
Screwing all of these does not take too long. It could be done in about 3 hours with an extra power drill battery ready to go.

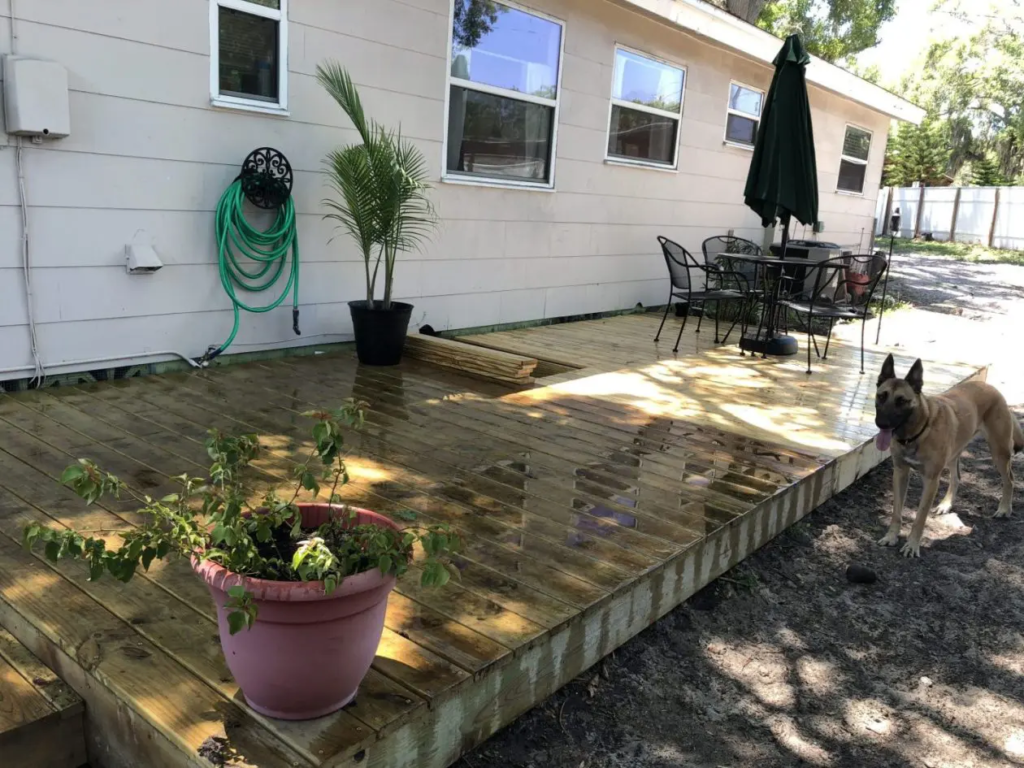
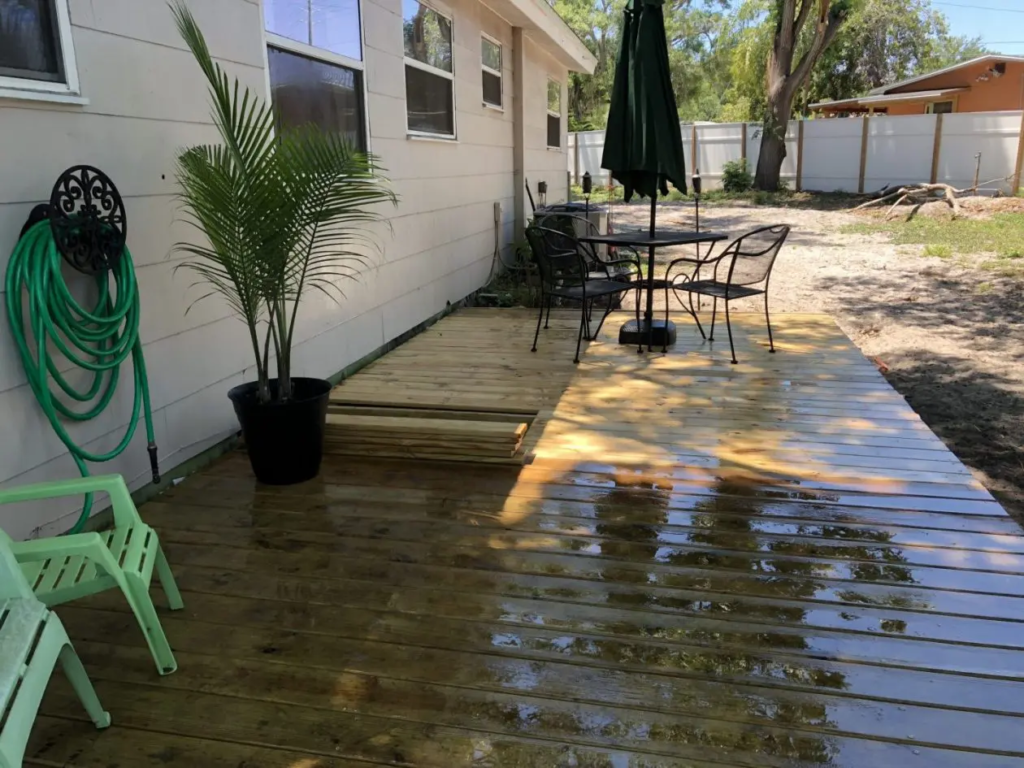
 Another pretty finished product shot looking so clean next to nothing but DIRT. Ahh see what I’m saying?!
deck #2
Deck #2 was a total after thought. I was happy with my mini-deck, and frankly I didn’t think I could extend it. Not because I wasn’t capable (obviously lol), but because the ONLY crawlspace under our house starts exactly where deck #1 ended… I wasn’t about to just build a deck over the only entry point for the cable guys!
Everyone has some backyard quirks.
Still, my deck was so small that I couldn’t even imagine it cute and styled. There wasn’t enough room for much of anything. So I started wielding my measuring tape again and thinking about what we could do.
BEHOLD! My cabernet induced genius decided to create a trap door for the crawlspace!
I took the last board off deck# to leave the frame exposed as a lip for the trap door the lay on.
It sure looks creepy right? Now you can understand why I wanted it hidden so bad! haha!

I used my kid brother as a guinea pig to determine the depth of the crawlspace frame and drew around the dang thing.
The crawlspace frame is 4’x2′ (the opening of the space is.. similar)
Now that I had a solution to my 10-foot-limit, I said Go big or go home! At this point I felt “experienced” with my 10′ deck and had a little catalog of free online resources to help me make sure my weights and joist spans were sufficient and safe.
Phase 1: framing
- 1 2″x8″ at 12′ PTL for that front piece
- 2 2″x8″ at 10′ PTL
- 3 2″x6″ at 12′ PTL interior joists
- 2 2″x6″ at 10′ PTL
- 2 4″x4″ at 4′ PTL deck posts
- 3 joist hangers (since I couldn’t drill/nail from the other side)

Phase 2: framing the crawlspace
I used 1 of the 2″x6″ at 10′ PTL and had the cutters at Lowes divide it into 1 4′ piece and 3 2′ pieces. Since I can’t cut myself, all of the cutting was outsourced either at the store or through my brother-in-law.
The 3 2′ pieces are for the underside of the “door” which is actually just a drop in slab.
I placed posts on the other side of both corners of the frame.


Phase 3: put a top on IT!
- 24 6″x5/4″ at 10′ PT deck boards
I placed deck blocks halfway between the 3 12′ joists before I lined up the boards and screwed them down one by one every day or so. Each board got 12 screws (2 per joist beam/joist)
Note that I did all the screw-driving this time. My husband was out of town for all of the construction of deck #2.
In fact, I had to do it all myself because I was determined to have it all done for my baby’s second birthday (& I did!). But my husband didn’t get into town until the day before. At that point there was only one thing left to do.
Phase 4: drill the door
This was surprisingly the hardest part! Ultimately, this is what the bottom side of the door looks like:

The most important parts of this door are the “mini-beams” at the edges. Without these, the door deck board collapse under your feet. But notice the beams only go as wide as the opening (or a little less) to sit within the lip I left. That was the goal!
Mind you, this picture was taken an entire year after the deck was built. We finally had a reason to access the crawlspace and just lifted my little engineering brilliance off like it was designed to do. Forgive me, I’m just super proud and love this stuff…!
And hey! I even got use out of it. It wasn’t pretty, but it worked and my husband didn’t want to do it lol.